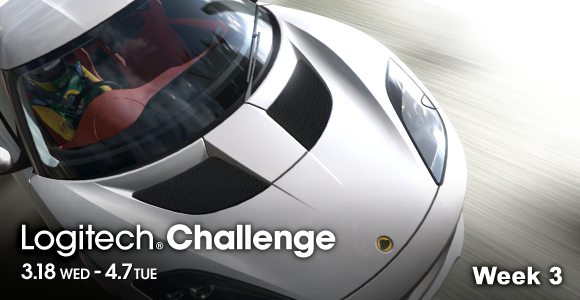
Logitech Challenge – Week 3 Strategies
Welcome to Week 3 of the Logitech Challenge, where Gran Turismo 5 Prologue owners can compete to win Logitech steering wheels and other prizes. This week’s competition challenges players to post their best lap time on the challenging Suzuka Circuit course with one of the high-end exotic cars available. In addition, five randomly-selected players will be picked, regardless of final lap time, to receive a Logitech Driving Force GT wheel. Here are some driving tips straight from Polyphony Digital to help you out:
With 20 corners in all, the Suzuka Circuit is well known as one of the world’s most technical circuits. Its figure 8 layout is rare even in comparison to other circuits worldwide.
The first half of this course is the clockwise technical section, where turning and stability is more important than engine power. The first section is where you will really see the difference in good and poor car settings, and where differences in driving skill become apparent. On the other hand, because differences in engine power are not as much of a factor in the first half, you can improve your lap time by selecting a lighter car.
Once you are past the overpass/underpass, you will be at the counterclockwise, high speed section of the course. Because there are longer straight-aways where you can apply full throttle in the second half of the course than in the first half, engine power becomes more important in this part of the course. This is especially true in the section from the back straight to the chicane after the spoon corner (the consecutive left corners), because how fast you get the car going in this section will be key in shaving time off of your lap time. If you are not confident with the first half, choose a car that is high powered, and try to make back the time in the latter half.
The reason Suzuka is considered a difficult and challenging course is the precision that is required for setting up your racing lines. Because the course width is narrow and the corners come one after another, making a mistake at one corner affects the following corners greatly. Try not to focus only on a single corner, but think of entire sections when considering your racing lines.
Also, though the technical layout of the Suzuka makes the driving line display option a good reference point for practice, the secret to improving your lap time on this course actually lies in ignoring the driving line and finding your own perfect line. This is a course where differences in cars and personal driving styles will affect where the best driving line lies.
Let’s take a look at a lap with the Ferrari F430. This is a high-power mid-engine-rear car with 490hp, and requires some skill to control, especially with this week’s slicker N3 tires and Professional Physics mode. In comparison to a front-engine car, the initial response of the steering is slightly slower, so you may want to start turning into corners slightly early to avoid missing your clipping points.
The entry into the first corner is a difficult point for beginners. Though the driving line will provide a reference, it is actually better here to brake diagonally into the corner towards the clipping point rather than braking in a straight line. However, you must be careful to keep the car stable, as you will be decelerating while you steer. What is important in this section is the second corner rather than the first. You want to approach corner 1 so that you set yourself up to clear corner 2 in an out/in/out fashion. Also, be careful not to go wide around the second corner, hitting the clipping point on the inside and accelerating out.
Your rhythm and racing lines are the key in next set of S-curves. It is important to place your clipping point on the cornerstone at the inside of the corner. Care is required here because if you miss even one clipping point, you will lose time over the entire S-curve section. You want to first let off of the accelerator (or brake lightly), turn in, and once the front end has changed direction, open the throttle gradually, and apply full throttle near the clipping point. You just have to repeat this process and memorize the rhythm through practice.
The last S-curve, the reverse bank, should be thought of as a set with the following Dunlop corner that turns widely left on an upward incline. First, go out/in/in on the reverse bank, and try not to go wide at the exit. By doing so, you will be able to approach the Dunlop corner from the outside. You can also follow the driving line, and turn your car towards the Dunlop corner as soon as you get through the reverse bank, but if you swing the car to the right just for a moment it will make your exit line out of the Dunlop corner a little easier to manage. Here, you’re prone to understeer it is a high speed corner, so if you start feeling understeer and the car starts to go wide, let off on the throttle a bit to adjust your speed.
The Degner corner consists of two consecutive right corners. There is a general tendency to enter the first right corner too fast, so you must remember to decelerate in advance. Because it is a high speed corner, you may be tempted to brake late, but you should restrain and keep in mind to go slow in/fast out. For the braking point, it should be fine if you use the driving line display as a reference. On the second corner of the Degner, there should be a good margin on the inside, so you should hit the inner clipping point and go out/in/out as usual. Just don’t hit the second corner too fast, or you’ll end up in the sand.
Next up is the hairpin corner. It is not difficult if you only look at it as a single corner, but you must remember that you will be applying full brakes while you still have horizontal G’s remaining from clearing the previous bend at high speed. It is very easy to disturb the posture of your car here. In addition, compared to front-engine cars, the brakes on the F430 will not respond as quickly, so it will be better if you let off on the throttle from just before the bend before the hairpin turn. Clear the hairpin in the usual out/in/out manner. Be careful as you exit the corner as you may experience oversteer if you open the throttle all at once.
The spoon corner where there are two consecutive, medium speed left corners, is an especially difficult section of Suzuka. Be careful not to enter the corner too fast. Refer to the driving line and turn wide around the corners, hitting the clipping points on both. Apply partial throttle while cornering and adjust to control speed. The most important thing here is your exit speed out of the second left corner. You want to open the throttle as early as possible here, to extend your top speed on the back straight.
This is an ultra high speed, 130R corner. The only thing that you need to watch for here is entering the corner too fast. The corner itself is not tight at all, so you may be tempted to not decelerate. But in a car like the F430, especially with N3 tires, don’t underestimate this corner. Decelerate using the driving line as a guide, turning the nose of the car in the first half of the corner so that you can apply the throttle from just before the clipping point.
This chicane, the last major hurdle before the final straight-away, consists of tight, consecutive right and left corners. Because it requires hard braking from high speed, you must make sure you do not brake too late. You can use the driving line as a reference for the braking point, but if you have the display turned OFF, you can use the distance to the sign just before the chicane as a reference as well. Also, because the exit speed out of the final left corner will affect your speed on the home straight, you want to make sure to accelerate early. You’ll be able to go through the chicane efficiently if you boldly ride half the car’s chassis over the insides of both corners.
-
Receive Two Special Race Cars With the Gran Turismo World Series 2026 Round 2 – Tokyo, Viewers Gift Campaign!
Round 2 of the 2026 Gran Turismo World Series will take place Saturday, Aug. 15,...
-
Receive up to 2,000,000 In-game Credits with the "Gran Turismo World Series" 2026 Round 2 - Tokyo "Predict the Winners" Campaign!
The "Gran Turismo World Series" 2026 Round 2 will take place on Saturday, 15 Aug...
-
The Gran Turismo World Series 2026 Round 2 - Tokyo, Special Page Now Open! Event Streamed Live on August 15!
The special page for Round 2 of the 2026 Gran Turismo World Series in Tokyo is n...
-
MOZA Racing Becomes an Official Partner of the Gran Turismo World Series
Polyphony Digital will welcome global sim-racing hardware manufacturer MOZA Raci...
-
The Gran Turismo 7 June Update: Five New Cars and Five New Races
Update 1.70 for Gran Turismo 7 will arrive June 11, 2026, and include the follow...
-
The Gran Turismo World Series 2026 Round 3 – Singapore: Tickets Now On Sale!
The Gran Turismo World Series brings the world’s fastest Gran Turismo drivers to...