Create Your Own Tracks
How to Use the GT6 Track Path Editor ④

*The online services for “Gran Turismo 6” have been terminated. The content created with the “Track Path Editor” can no longer be used in-game.
Continued from the previous page, "How to Use the GT6 Track Path Editor ③". (Screenshots are taken from the iPad version of the app.)
Item Mode
Once you have finished laying out your track line, it's time to proceed to Item Mode, where you can place items alongside your track. The following options/information are displayed in Item Mode:
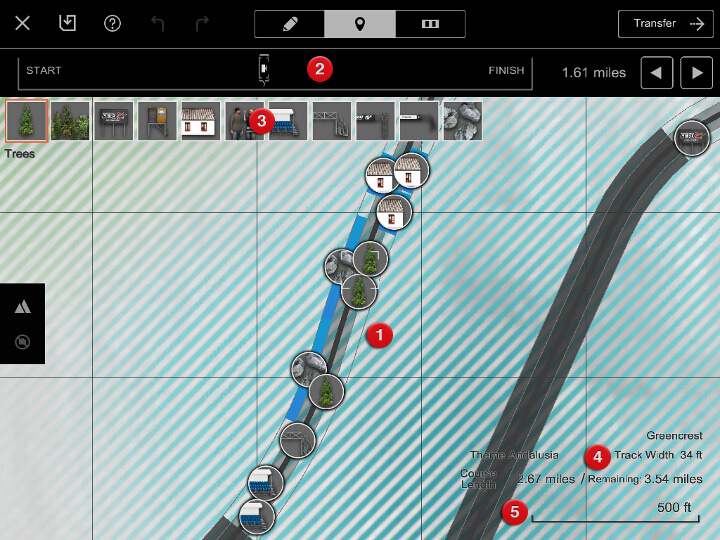
- Map
- This map is used to place your items. You can move the Item Mode map along your track line. Use the navigation bar at the top of the screen to quickly move to a location of your choice.
- Navigation Bar
- Drag the camera icon located between "START" and "FINISH" left and right, or tap and hold the navigation buttons located to the right of it to move the pointer on the map.
- Layout Items
- A list of items that can be placed alongside your track. The number and types of items that can be used depends on the theme that you chose.
- Track Information
- The track theme and track width, as well as the current length of the track, and how much longer it is possible for you to make it.
- Scale
- The scale of the map.
Placing Items
There are two areas in which items can be placed next to your track. The "inside" of the track is known as the "inner area", while the "outer area" is the "outside" of the track. To place an item, tap the item list displayed at the top-left of the map, tap an item to select it, then tap the position you'd like to place it in one of the two areas. Once you have selected an item, you can keep tapping the track to place more and more of them. Items can be moved by dragging them. Items cannot be placed on top of each other.
Each item can only be placed in certain areas, and each has a certain length. There are some items which straddle both the inner and outer areas. Items cannot be placed where the track line is shown in dark grey, for example on the home straight or on certain corners.
Kerb Mode
Once you've placed your chosen combination of items next to your track, it's time to proceed to Kerb Mode, and place some kerbs at the edge of the track. The following options/information are displayed in Kerb Mode (please note that Kerb Mode is not available if you are using the Death Valley theme):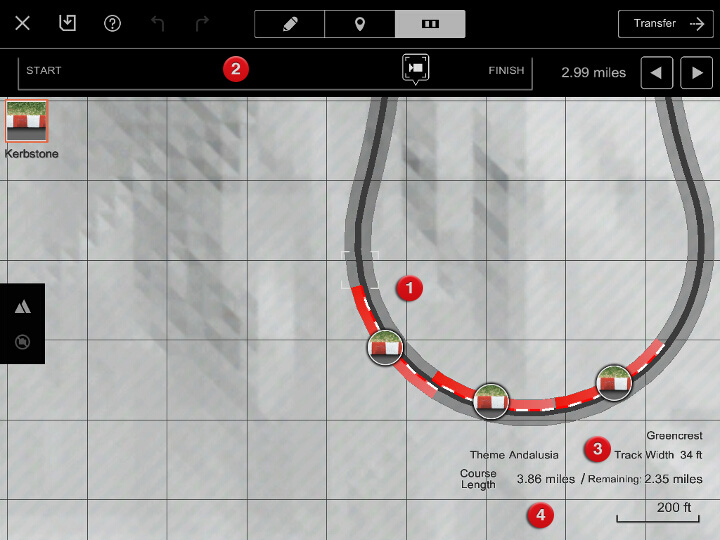
- Map
- This map is used to place your items. You can move the Kerb Mode map along your track line. Use the navigation bar at the top of the screen to quickly move to a location of your choice.
- Navigation Bar
- Drag the camera icon located between "START" and "FINISH" left and right, or tap and hold the left/right arrows located to the right of it to move the pointer on the map.
- Track Information
- The track theme and track width, as well as the current length of the track, and how much longer it is possible for you to make it.
- Scale
- The scale of the map.
Placing Kerbs
The area in which kerbs can be placed is displayed along the side of your track. Tap this area to place a kerb in that location. Kerbs can be moved by dragging them. Kerbs can be placed on any section of track apart from the home straight.
Transfer Your Track
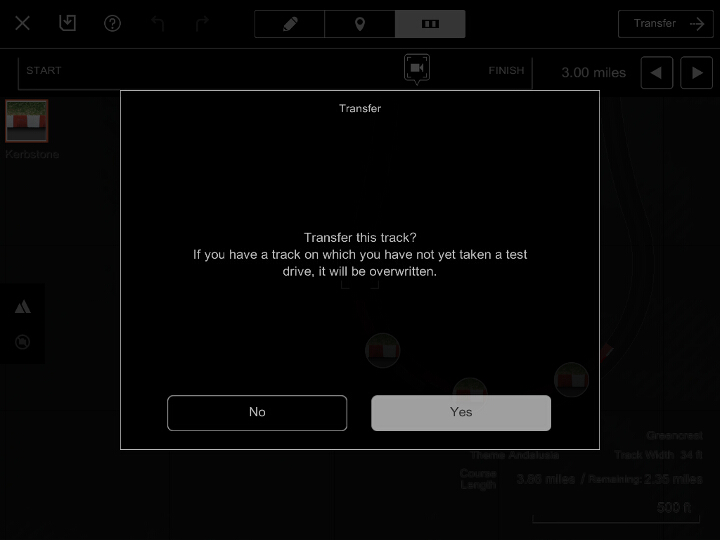
Once you've finished creating your track data, it's time to transfer it to Gran Turismo 6. To do so, simply tap the "Transfer" button, displayed at the top-right of the screen in every mode. If you are not signed in to PlayStation™Network, your browser will be launched. Your track data will be transferred as soon as you have signed in.
Track data can be transferred even when Gran Turismo 6 is not running. If you do so, track data will be temporarily stored on the server.
Transferring track data from the Track Path Editor and loading/saving it with the Track Path Importer is a process that can only be done for one track at a time. If you transfer a new track before the previously transferred track has been saved in the Track Path Importer, then the older track will be deleted. Please be careful.

- © 2016 Sony Interactive Entertainment Inc. Developed by Polyphony Digital Inc.
Manufacturers, cars, names, brands and associated imagery featured in this game in some cases include trademarks and/or copyrighted materials of their respective owners. All rights reserved. Any depiction or recreation of real world locations, entities, businesses, or organizations is not intended to be or imply any sponsorship or endorsement of this game by such party or parties. "Gran Turismo" logos are registered trademarks or trademarks of Sony Interactive Entertainment Inc.
